
Convert Excel to JPG Online and Free
Making an image can be helpful in situations where you wish to utilize an Excel chart or table as a jpeg or png in other programs or presentations without worrying about formatting issues, linkages, etc.
The Excel data can then be accessible to anybody interested and shared in a few minutes.
Spreadsheets such as MS Excel or Microsoft Excel are among the most commonly used programs worldwide and are part of the Microsoft Office Suite. Microsoft Excel allows users to save spreadsheet documents in various formats. Although it includes several file formats in its ‘Save As dialogue, it lacks the JPG format. Excel does not directly support saving spreadsheets as JPG files.
Some users may find converting an Excel document to a JPG or another picture format more useful. The JPG format is easily accessible on practically all devices without installing third-party software. Therefore, we’ll have to know how to convert Excel to JPG in various ways. The various techniques to convert or save Excel files to JPG formats are covered in this article.
Also Read: How To Save Excel As PDF.
Convert Excel to JPG using Print Screen
The quickest and easiest way to capture the on-screen part of an Excel sheet and save it as a JPG or other image file is to use the Print Screen button on the keyboard. This method, however, is inefficient for large volumes of data because it takes a long time to capture each Excel sheet’s screen individually. We can use this method to work offline with a tiny portion of the Excel sheet while working on the file.
The following steps are included in this method:
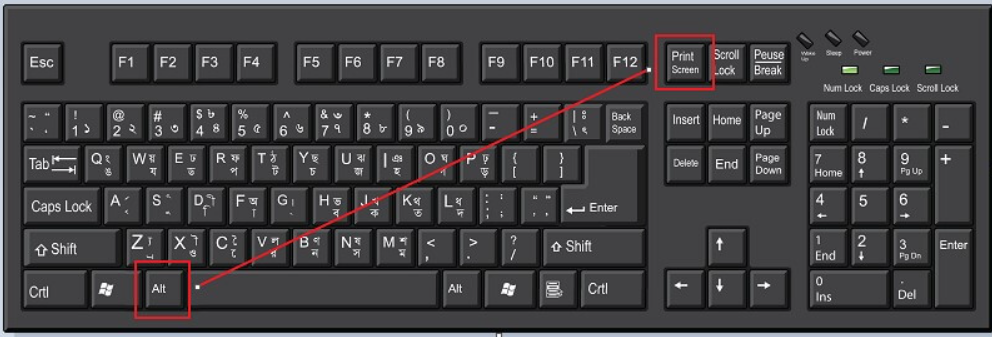
Step1: First, we’ll have to zoom in/out on a particular worksheet section to make the essential data visible throughout the entire screen.
Step2: Then, while holding the ‘Alt’ button, press the ‘PrtSc’ or ‘Print Screen’ button on the keyboard.
Using the Image Snipping Tool, convert Excel to JPG:
Using the snipping tool to convert Excel to JPG is another option. This method also works offline and does not require installing third-party software on a Windows system. After Windows 7, the snipping tool is a little program that comes as a system utility with all modern versions of Windows.
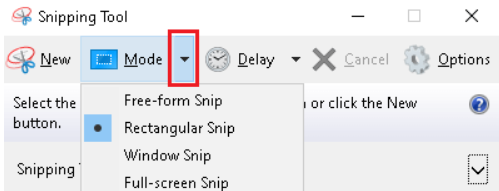
Unlike the Print Screen feature, which takes the entire visible contents of the screen, the snipping tool lets users choose from a variety of capturing options, including:
This method includes the following steps:
Step1: To start, open the Excel sheet and zoom in/out on the part of the sheet that contains important information.
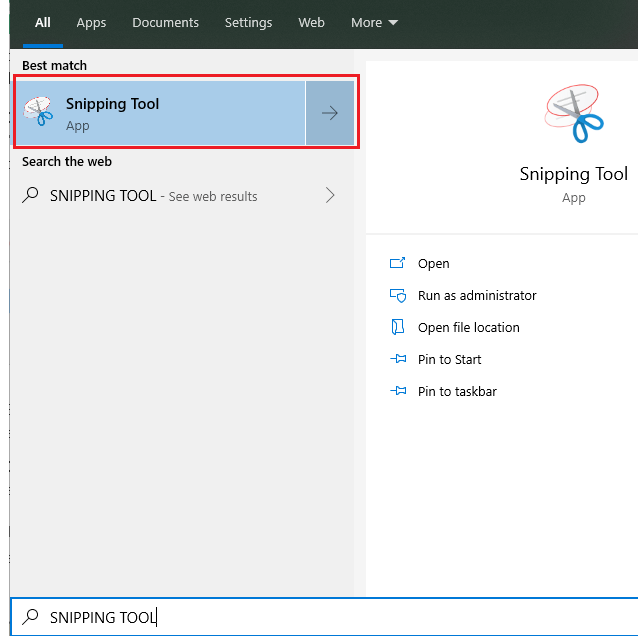
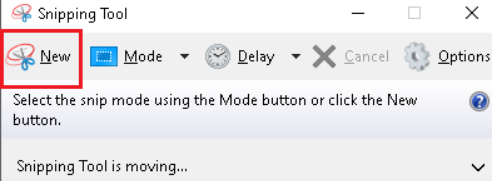
Step2: Must then launch the Snipping Tool tool. Hit the Windows key and then type ‘Snipping Tool’ into the Windows Search Box to find the snipping tool. After that, from the list of results, double-click on Snipping Tool.
Step3: Once opening the Snipping Tool, we must choose the required capture mode. Click the drop-down arrow next to the ‘Mode’ button on the top menu bar to select the desired mode.
Step4: After selecting the mode, click the ‘New’ button and select the area of the Excel sheet that we want to capture and save as a JPG file.
- Alternatively, press the keys window + shift + s to launch the snipping tool; simply drag and catch the portion and paste it wherever you like.
Convert Excel to JPG using Copy/Pasting:
We can remove certain limitations by using the copy/paste feature to capture Excel sheets. This means that, unlike the previous two approaches, we can choose more data from the worksheet without making it visible on the screen. We can even capture massive volumes of data this way. Ex. A table contains hundreds of thousands of rows.
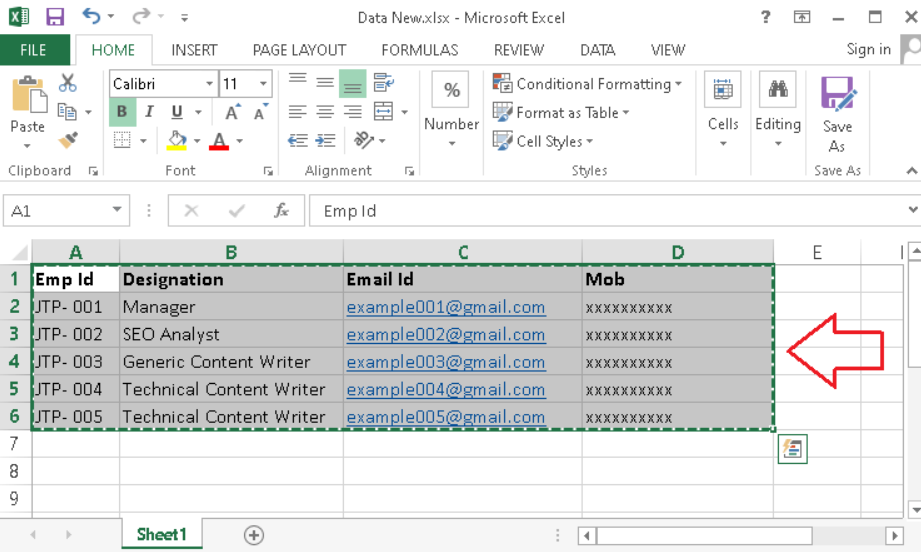
Step1: First, open a particular excel file and choose the necessary data from the sheet, including charts, shapes, or other excel data. Select the first cell and then press the shortcut ‘Ctrl + Shift + Enter’ to select the complete data of the sheet.
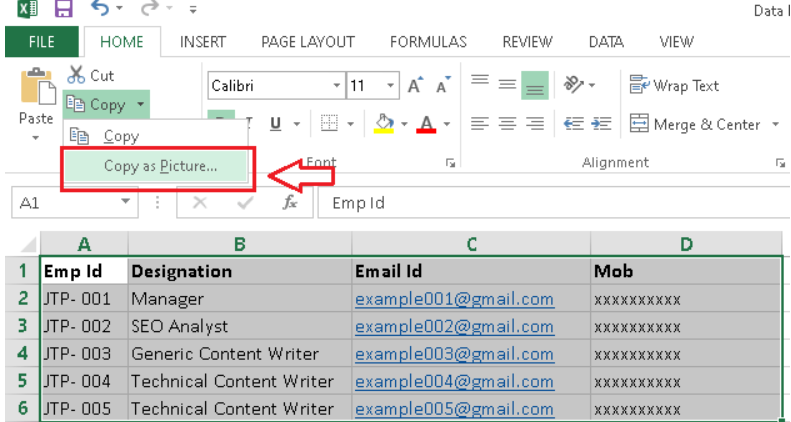
Step2: Go to Home > Copy > Copy As Picture; we save it as a JPG after selecting the data.
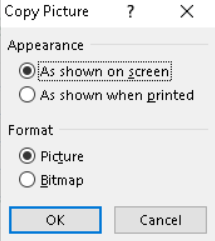
Step3: It will ask if we want to save the selected data as it appears on the screen or when printed. We have the option to make the appropriate decision.
Step4: Once copying the data, we must paste it (Ctrl + V) into any graphic editing software, such as MS Paint.
Step5: After pasting the data into MS Paint, press the ‘Ctrl + S’ shortcut key or select the ‘Save’ option. Select the ‘JPEG (.jpg)’ file type on the next screen and click the ‘Save’ button. Will create a JPG image file with the necessary data.